

 10396
10396
Introduction
This report allows you to view all of your declined transactions during a specific time period, allowing you to see details about the transactions, including the customers who submitted them and the reasons each transaction failed.
Run a Report
Follow these steps to run the Declined Transactions report:

- Login to the Segpay Merchant Portal at: https://mp.segpay.com, and point your mouse at the Performance Reporting menu. Select Declined Transactions.
The following steps will help you generate a report with the data you want.
Click the Saved Reports menu if you have run the Declined Transactions report before and want to retrieve a specific report you’ve run previously, so you don’t have to re-create it (see the Saved Reports section near the end of this document for more detail). Otherwise, see step 2 below to generate a new report.

- Click the date-selector box and choose the time period you want to report on. Select Today, Yesterday, This Month (the current calendar month), Last Week (the last completed Sunday-Saturday period), Last 7 Days, Last 30 Days, Last Month (the previous calendar month) or pick a Custom Range and click a start date, then an end date in the calendars:

 Next, select the merchant account(s) you want to see in the report (assuming you have more than one). Notice the search box, which comes in handy if you have a long list of merchants to scroll through.
 Select which specific Cash program(s) you want included in the report. This groups your websites together by the cash/affiliate program(s) they are associated with, so it may be easier for you to report by cash program instead of selecting URLs in the next step.
 Click the URL(s) menu to see a list of your websites. If you selected specific cash program(s) in the previous step, you will only see URLs associated with the selected programs. All URLs are selected by default, but you can select only specific sites to be included in the report. Note the Search box, which makes it easier to find a specific site if you have a large list.
- Select the types of declined transactions you want included in the report:

-
- Signups: declines on th e initial signup.
- Conversions: declines when converting from a trial period to a full membership.
- Rebills: declines on a recurring subscription charge.
Click Select All to include all types of declined transactions in the report.
- Click Generate Report. By default, results are sorted reverse-chronologically by date. Each row represents a specific declined transaction.

Note that, if your report includes transactions in multiple currencies, the total for the Amount column will reflect a blended total of all currencies. Filter the Amount column to display one currency at a time, to see true totals for each (see next section for help with grouping or filtering).
You can drill down into any purchase listed in your report by clicking on the Purchase ID. A new tab will open with the details about the purchase you selected.
Customize Report Results
Many reports have similar elements that can be used to customize the report. See below for some sample elements that are available in this report. Note screen shots may not be an exact match for the data returned on this report.
Choose from a Saved Report
 Most reports have four small icons in the top right corner. The one shaped like a floppy lets you save your report filter choices so that you can easily retrieve them later.
Just click the icon and type in a name to use when retrieving your report filter. If you choose the same name again it will let you overwrite the old filter. You can also rename and delete your filters.


When you are ready to use your filter just click ‘Choose from a saved report’ to pull up your saved filter. This can save you time if you run the same report many times. Note saved reports save filters but do not save groupings.
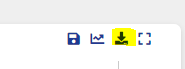 Download my Report
To download your report choose the icon in the top right that looks like a down arrow.

Then give your report a name and choose the format for your download (CSV,XSLX,PDF) and click the download button.
On some reports that return thousands of rows of data you will be given some additional choices for your download. You will see an option to have your report emailed to you.
Large reports may be emailed to you in a zip archive format. Very large reports (usually in PDF format) can require the zip archive to be split into multiple emails for delivery. Save all attachments to the same folder and open the first one and it will uncompress them together into a single large file.
Report Charts
In the top right corner of your report you will see several small icons. The icon with the waving arrow will allow you to see a chart view of your report.

When viewing each chart type you can use the other dropdown filters to change the way your chart data is represented on the page. Experiment with different options to see which gives you the best view for that chart type.


Result Table Filtering in your Report
Your report data is returned in a tabular grid format. There are several useful controls built into this grid for filtering and sorting your data.


Page Controls and both Horizontal and Vertical Scroll Bars will help you to see data that is too large to fit on the screen.

Use the arrows to advance to a certain page or go all the way to the last page. You can also control how many items display on a single page. Totals are shown to the right.
Please feel free to let us know any thoughts or suggestions you have about this report or anything else, by emailing [email protected].

